Edit Event
Overview
The Edit Event feature allows Admins and Event Organizers to modify existing events. Refer to Create Event for more information.
Only users with the EVENT_UPDATE permission can create events. For more information about permissions, visit Permissions Guide.
Accessing the Edit Event Feature
Go to Event Details:
- In the Dashboard site, navigate to the event you want to edit by clicking Open -> Event Details.
- Click on the Edit Event button in the sidebar.
- This will open the Edit Event form, which consists of multiple steps.
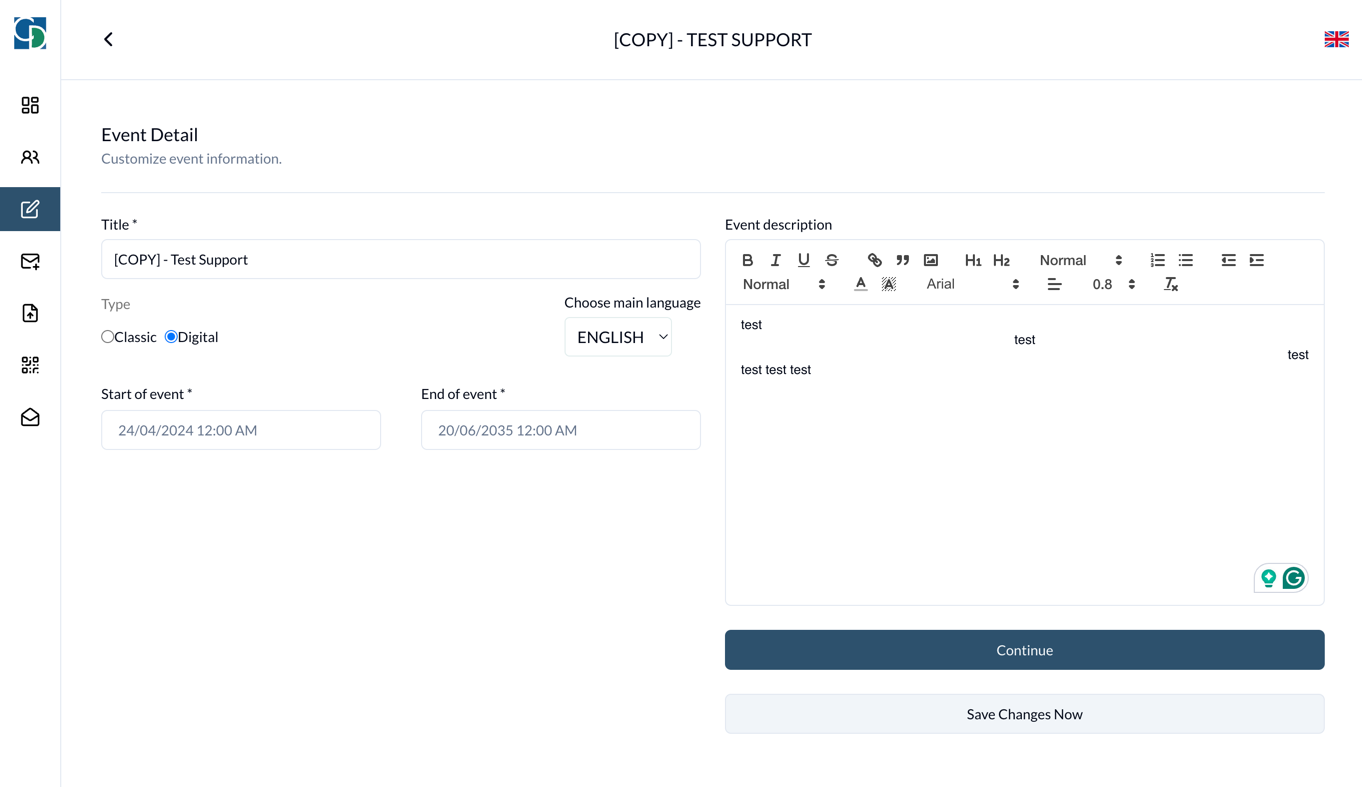
Step 1: Event Information
- Title: Update the event's title.
- Type: Modify the event type to either Classic or Digital.
- Classic Event: Requires additional fields such as hotel name, address of the event, and country.
- Start Time: Update the start time of the event.
- End Time: Update the end time of the event.
- Event Description: Modify the description of the event.
- Save change now: Click the Save change now button to update the event immediately.
Step 2: Form Builder
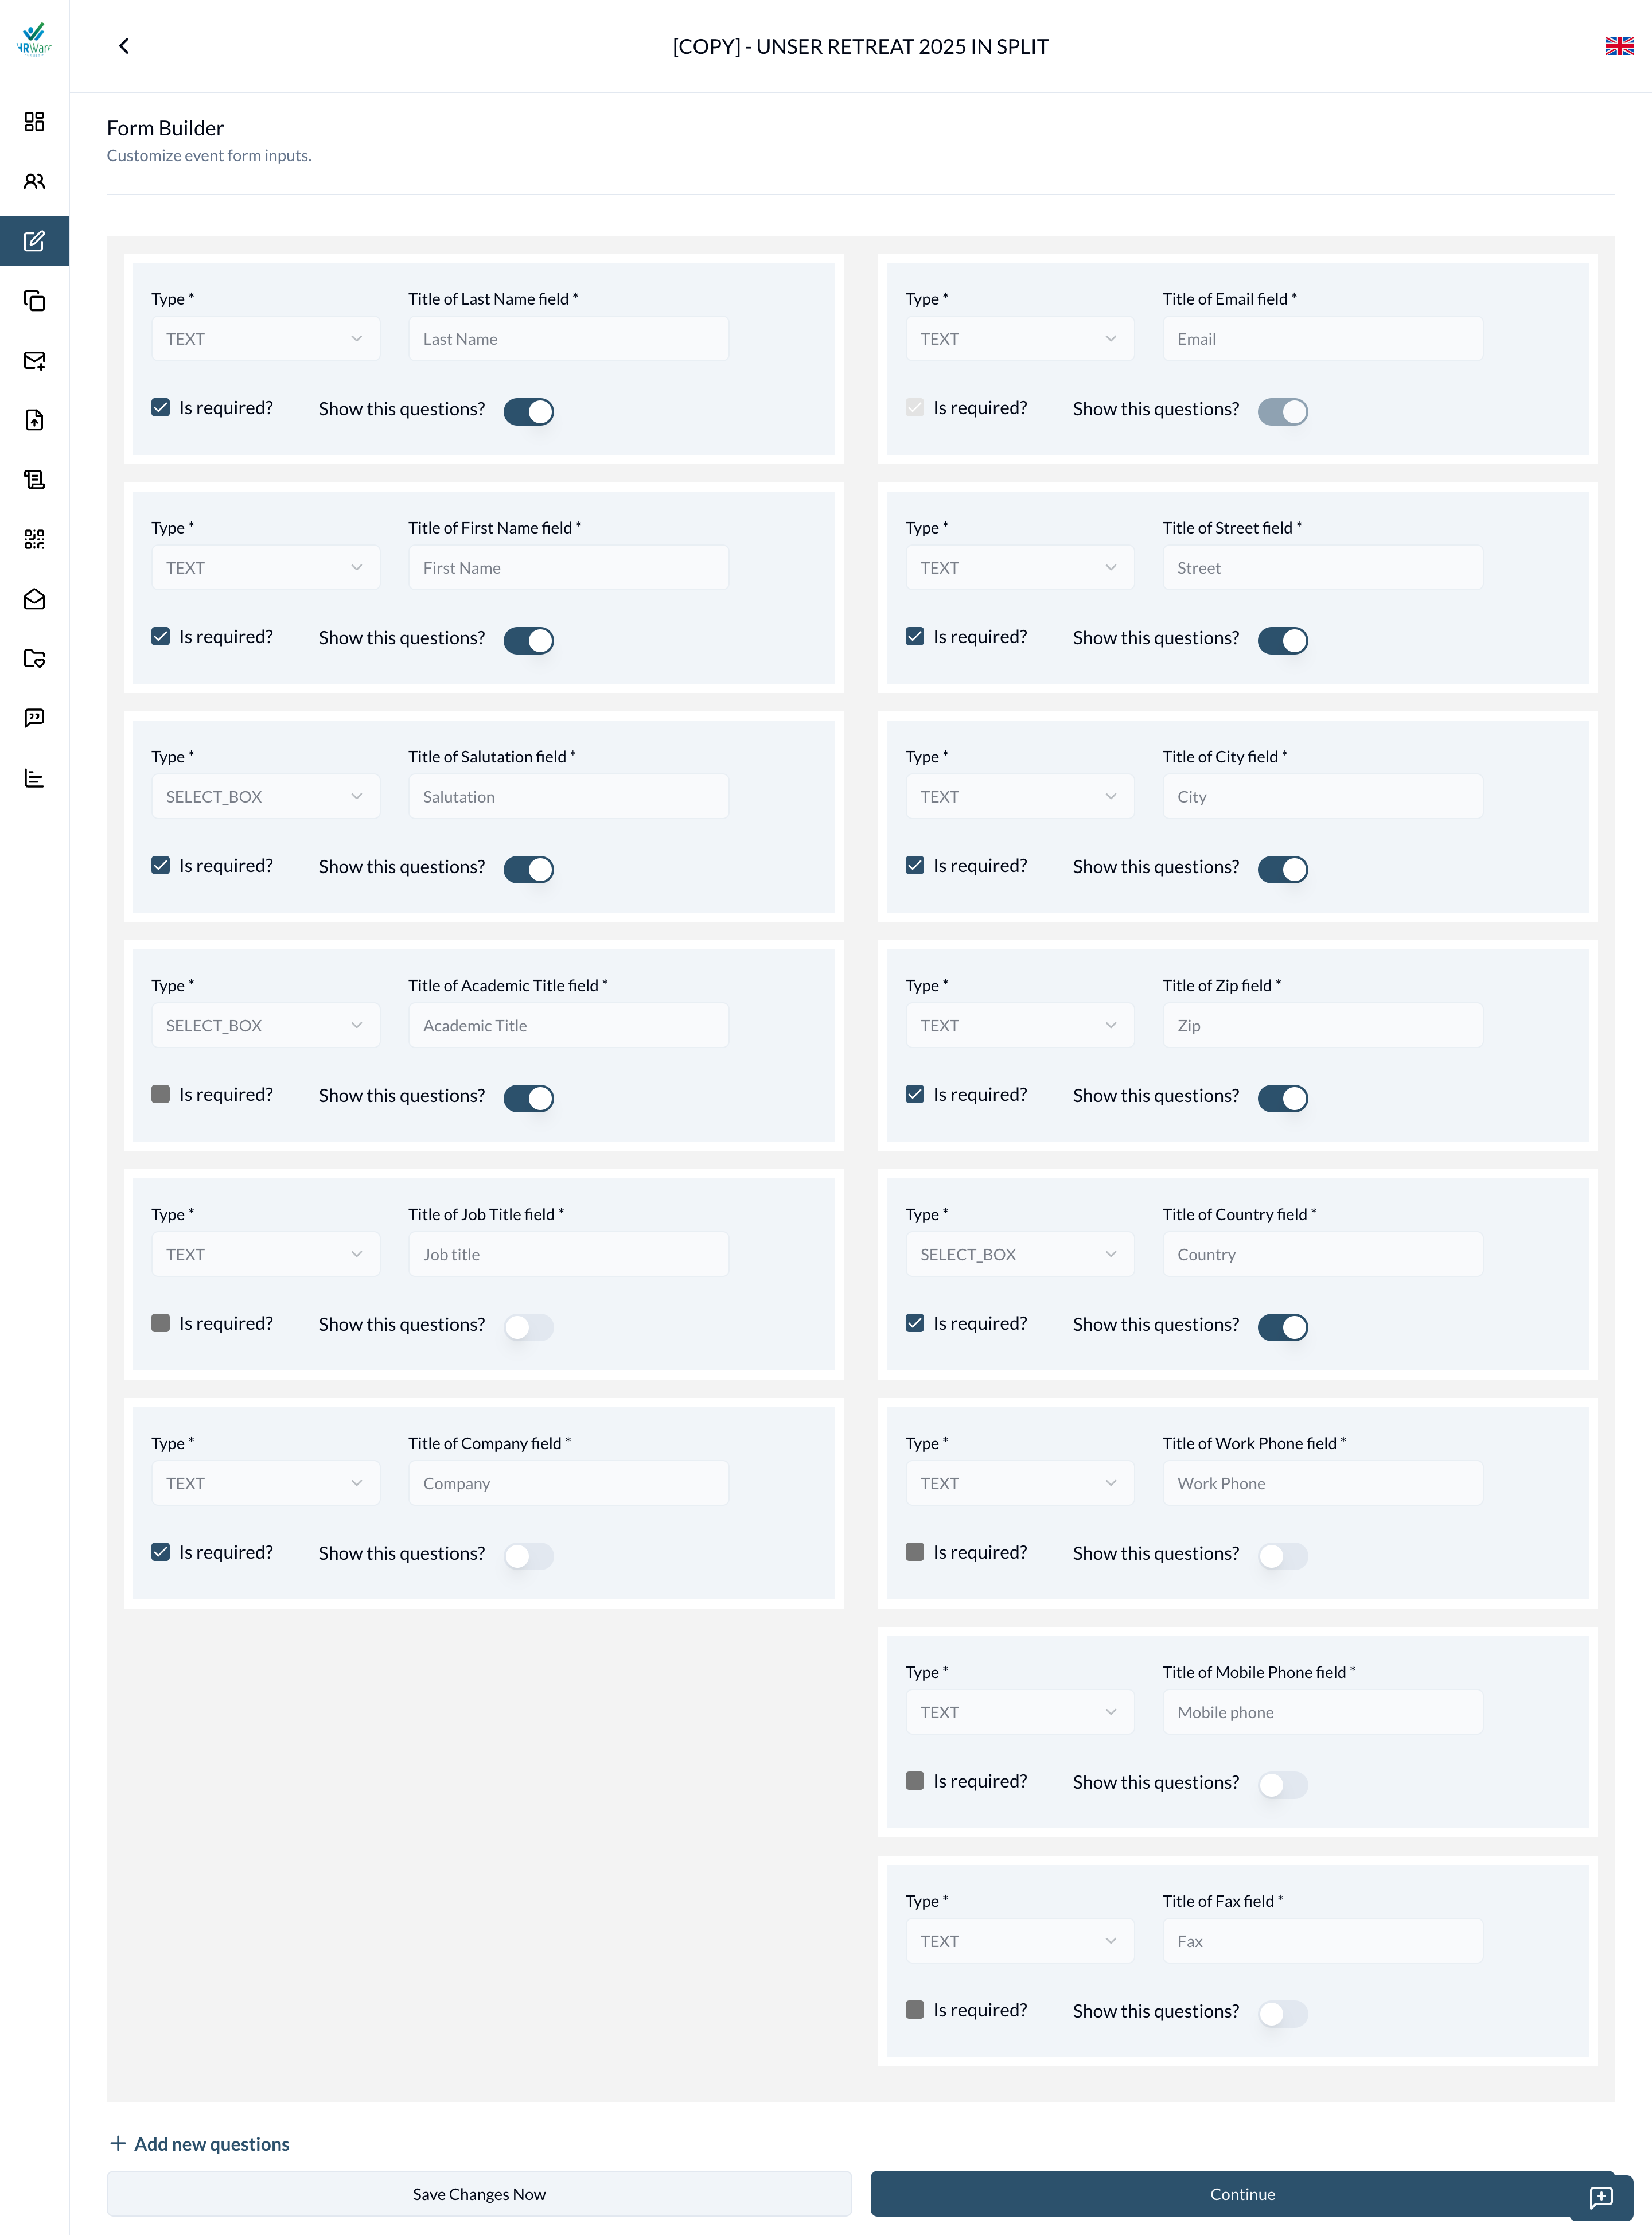
The Event Form Builder allows event organizers and admins to tailor the attendee registration form according to the specific needs of the event. This customization ensures that only relevant information is collected from attendees, streamlining the registration process.
1. Default Fields Customization
-
Available Fields:
- First Name
- Last Name
- Salutation
- Academic Title
- Job Title
- Company
- Address: Street, ZipCode, City, Country
- Work Phone
- Mobile Phone
- Fax
-
Customization Options:
- Required: Toggle whether the field is mandatory for the attendee to fill out.
- Show/Hide: Choose whether the field is displayed on the registration form.
Example: An organizer can choose to hide the "Academic Title" field if it is not relevant to the event or make the "Job Title" field mandatory.
-
Save change now: Click the Save change now button to update the event immediately.
2. Adding Custom Selections: An organizer can add more custom selections by clicking on the Add new question button.
Field Types:
-
TEXT: For open-ended responses.
-
CHECK_BOX: Allows multiple selections.
-
SELECT_BOX: Provides a dropdown list for single selection.
-
DATE_TIME: For selecting dates and times.
-
RADIO_BUTTON: Allows single selection from multiple options.
-
Customization Options:
- Title: Enter the question or label for the field.
- Required: Toggle whether the field must be completed by the attendee.
- Show/Hide: Choose whether the field is displayed on the registration form.
Example: If additional information is needed, such as dietary restrictions, an organizer can add a custom field titled " Dietary Restrictions" with a TEXT input type and make it optional or required.
All default fields and custom fields can be dragged and dropped to reorder them. In the register form, the fields will be displayed in the order they are set in the form builder. [Updated at 11/02/2025]
- Save change now: Click the Save change now button to update the event immediately.
- Form Display for Attendees:
- During event registration, attendees will only see the fields that have been toggled to "Show."
- Fields marked as "Required" must be completed before the registration can be submitted.
- Save change now: Click the Save change now button to update the event immediately.
Step 3: Event Settings
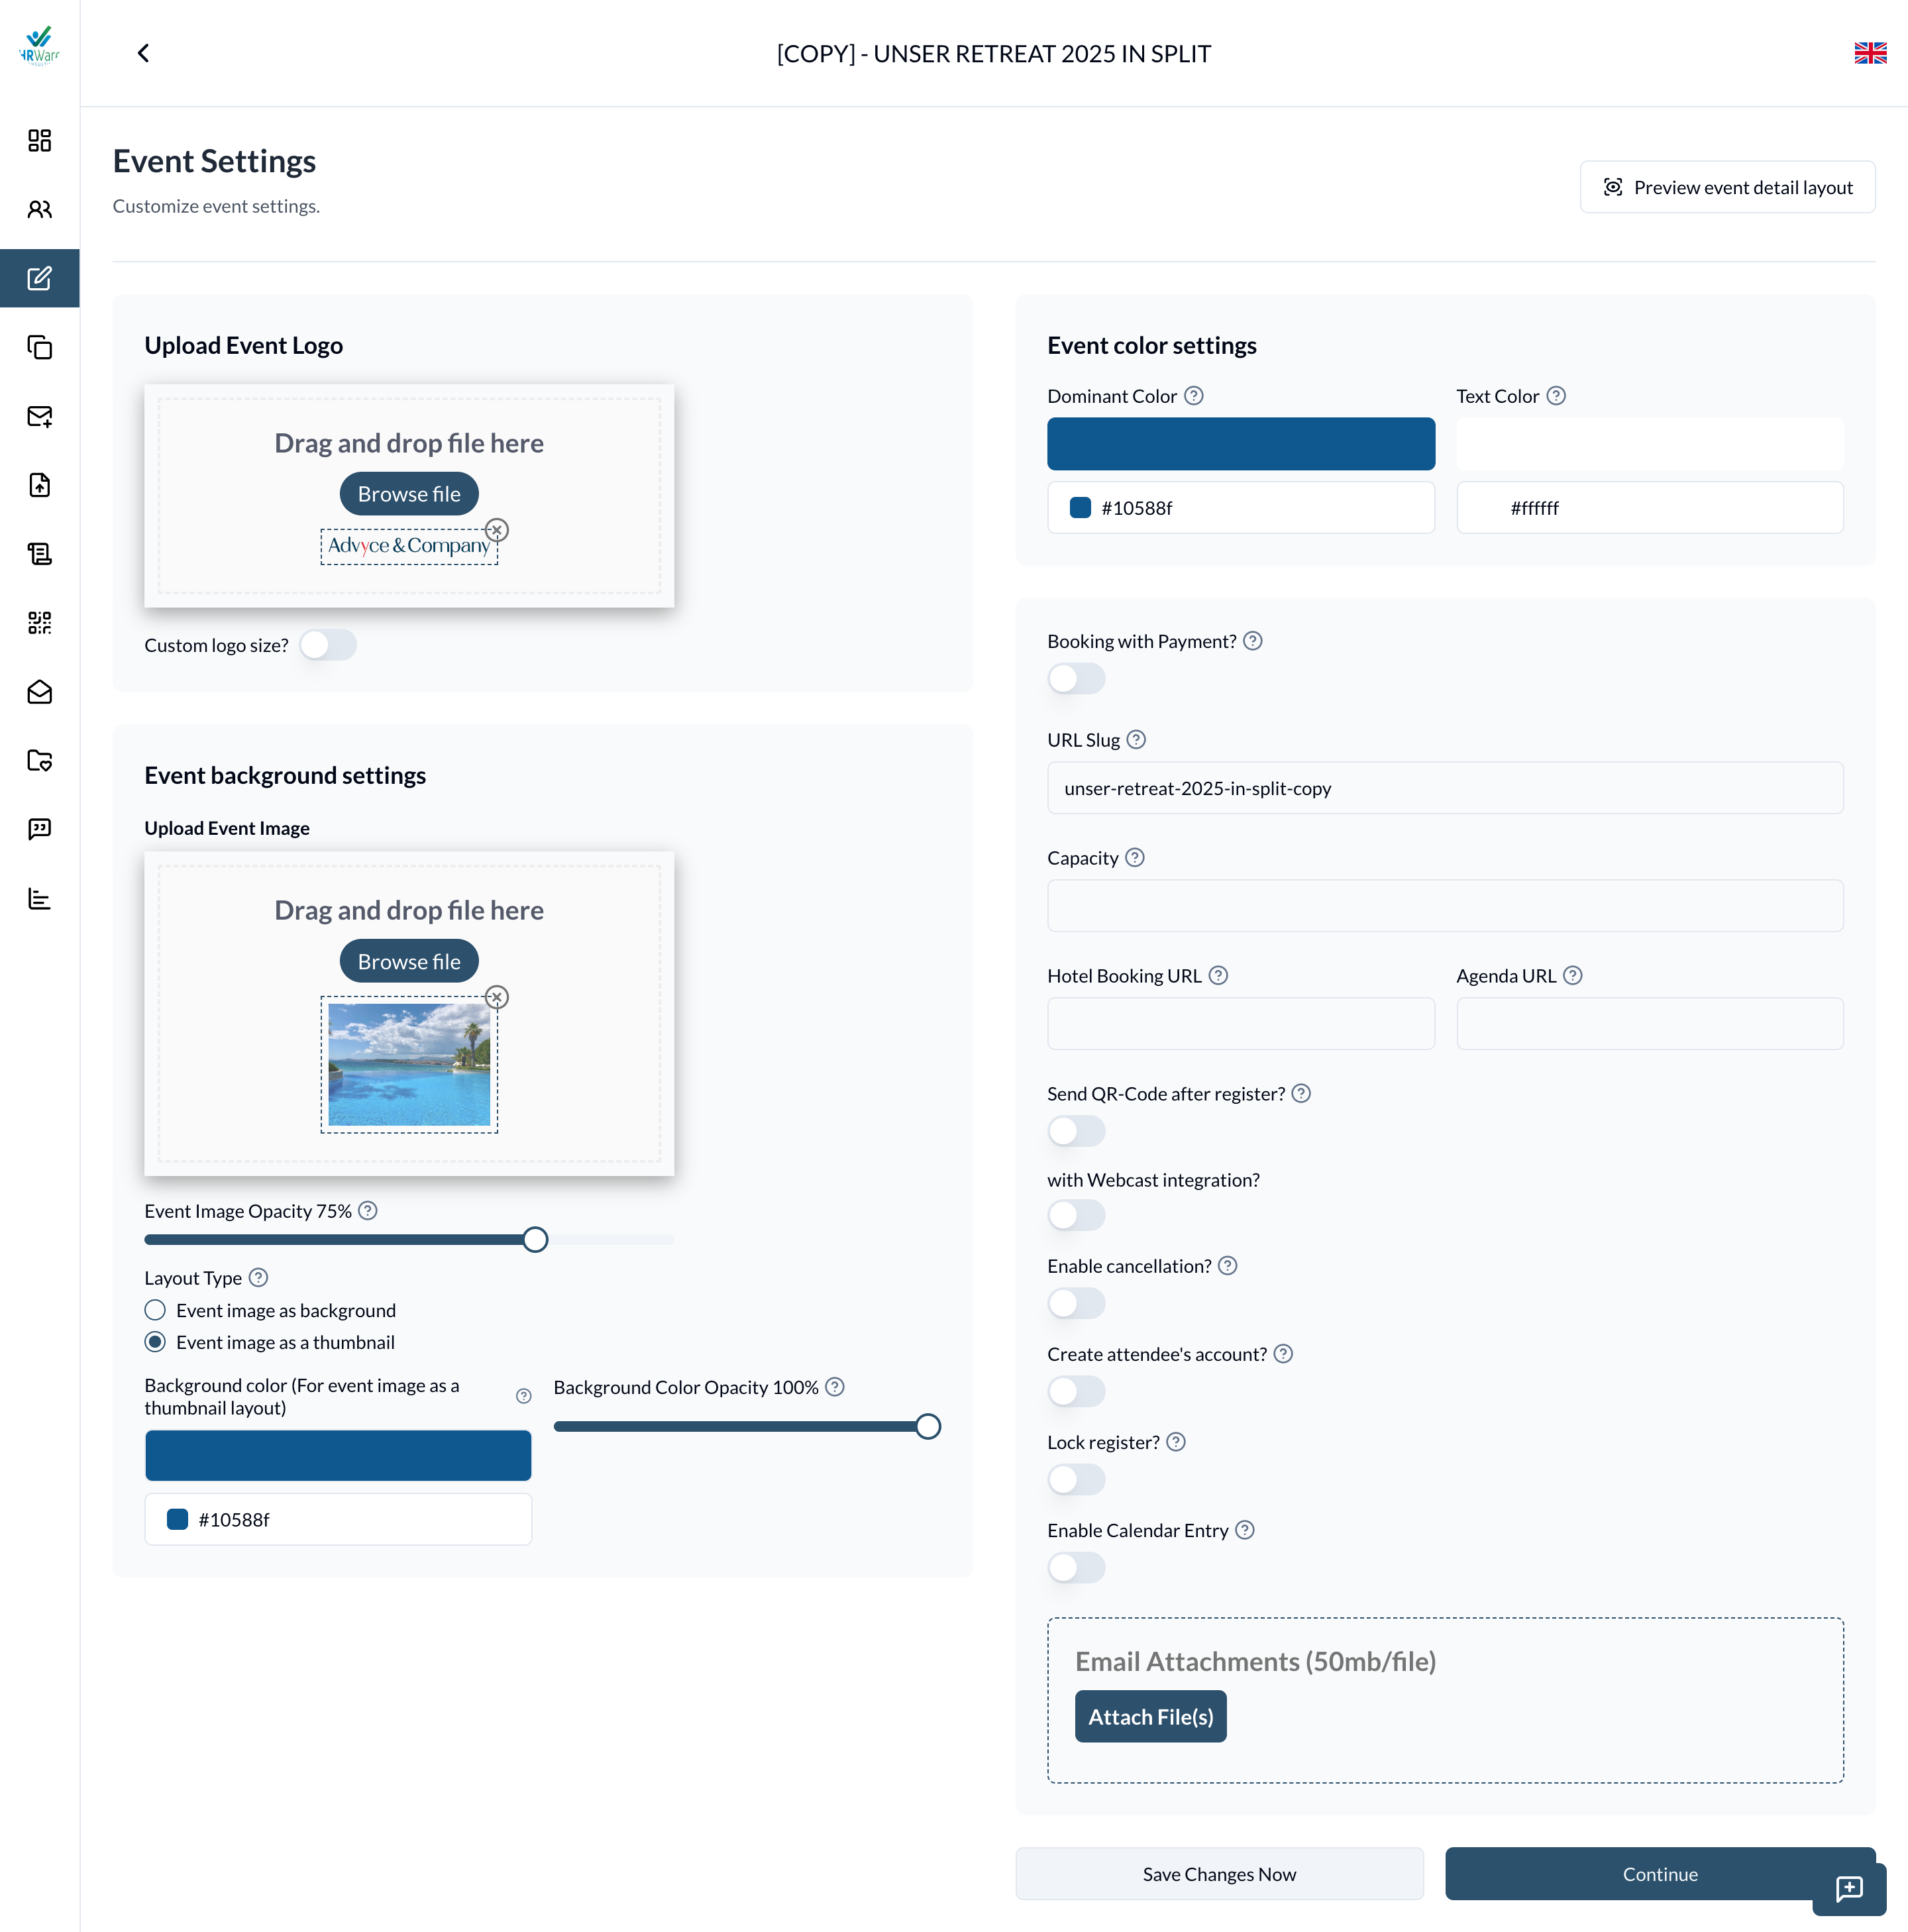
- Upload Event Logo: Change the event logo. To customize the logo size, click on the logo and resize.
- Event background settings:
- Upload Event Background: Change the background image. Use the slider to adjust the transparency of the background image.
- Layout type: Select the layout type of the event. Has two options:
- Event image as background: The event image will be displayed as the background of the event.
- Event image as thumbnail: The event image will be displayed as the thumbnail of the event.
- Background color (For event image as a thumbnail layout): Background color of the event detail (For event image as a thumbnail layout)
- Background Color Opacity: Opacity of the background color above.
- Event color settings:
- Dominant Color: Change the main background color of the event.
- Text Color: Change the text color of the event.
- Toggle Booking the Event with Payment?: If enabled, update the price per person and select the currency (Euro or USD).
- Show Price: Toggle this switch to show the price per person. This setting is shown only if the Toggle Booking the Event with Payment? is enabled.
- Price per person: Update the price per person.
- Currency: Select the currency (Euro or USD).
- URL Slug: Update the URL slug for the event. It is used to generate the event URL.
- Capacity: Update the maximum number of attendees that can register for this event.
- Hotel Booking URL: If the event type is Classic, update the hotel booking URL.
- Agenda URL: Update the URL of the agenda, which will be served when attendees scan the QR code. (Link to QR Codes Management)
- Send QR-code after register?: Toggle this switch to enable or disable sending a QR code to attendees after they register.
Is Business Event?: Toggle this switch if the event is a business event, requiring attendees to fill in company and job title fields during registration.- With Webcast Integration?: Toggle this switch to enable or disable webcast integration. Ensure the organization has the event source ID in Organization settings. (Link to Manage Organization)
- If enabled, the Webcast tool will create an event, and attendees who register for this event will also be participants in the webcast event and can join the webcast video meeting.
Send Confirmation by the Organizer Email?: Toggle this switch to send confirmation emails from the organizer's email instead of mars agency email. Ensure the email credentials are configured in Organization settings.- Enable Cancellation?: Toggle this switch to allow attendees to cancel their registration for free events. Paid events cannot be canceled.
- Create Attendee's Account?: Toggle this switch to create an account for the attendee after registration. If the attendee already has an account, they will not receive an email about account creation.
- Lock Register?: Toggle this switch to lock event registration immediately. Normally, registration is only locked after the event's end time.
- Enable Calendar Entry: Toggle this switch to allow attendees the option to add the event to their personal calendars.
- Email Attachments: Upload files that will be sent as attachments with the confirmation email after attendee registration.
- Save change now: Click the Save change now button to update the event immediately.
Step 4: Email Content
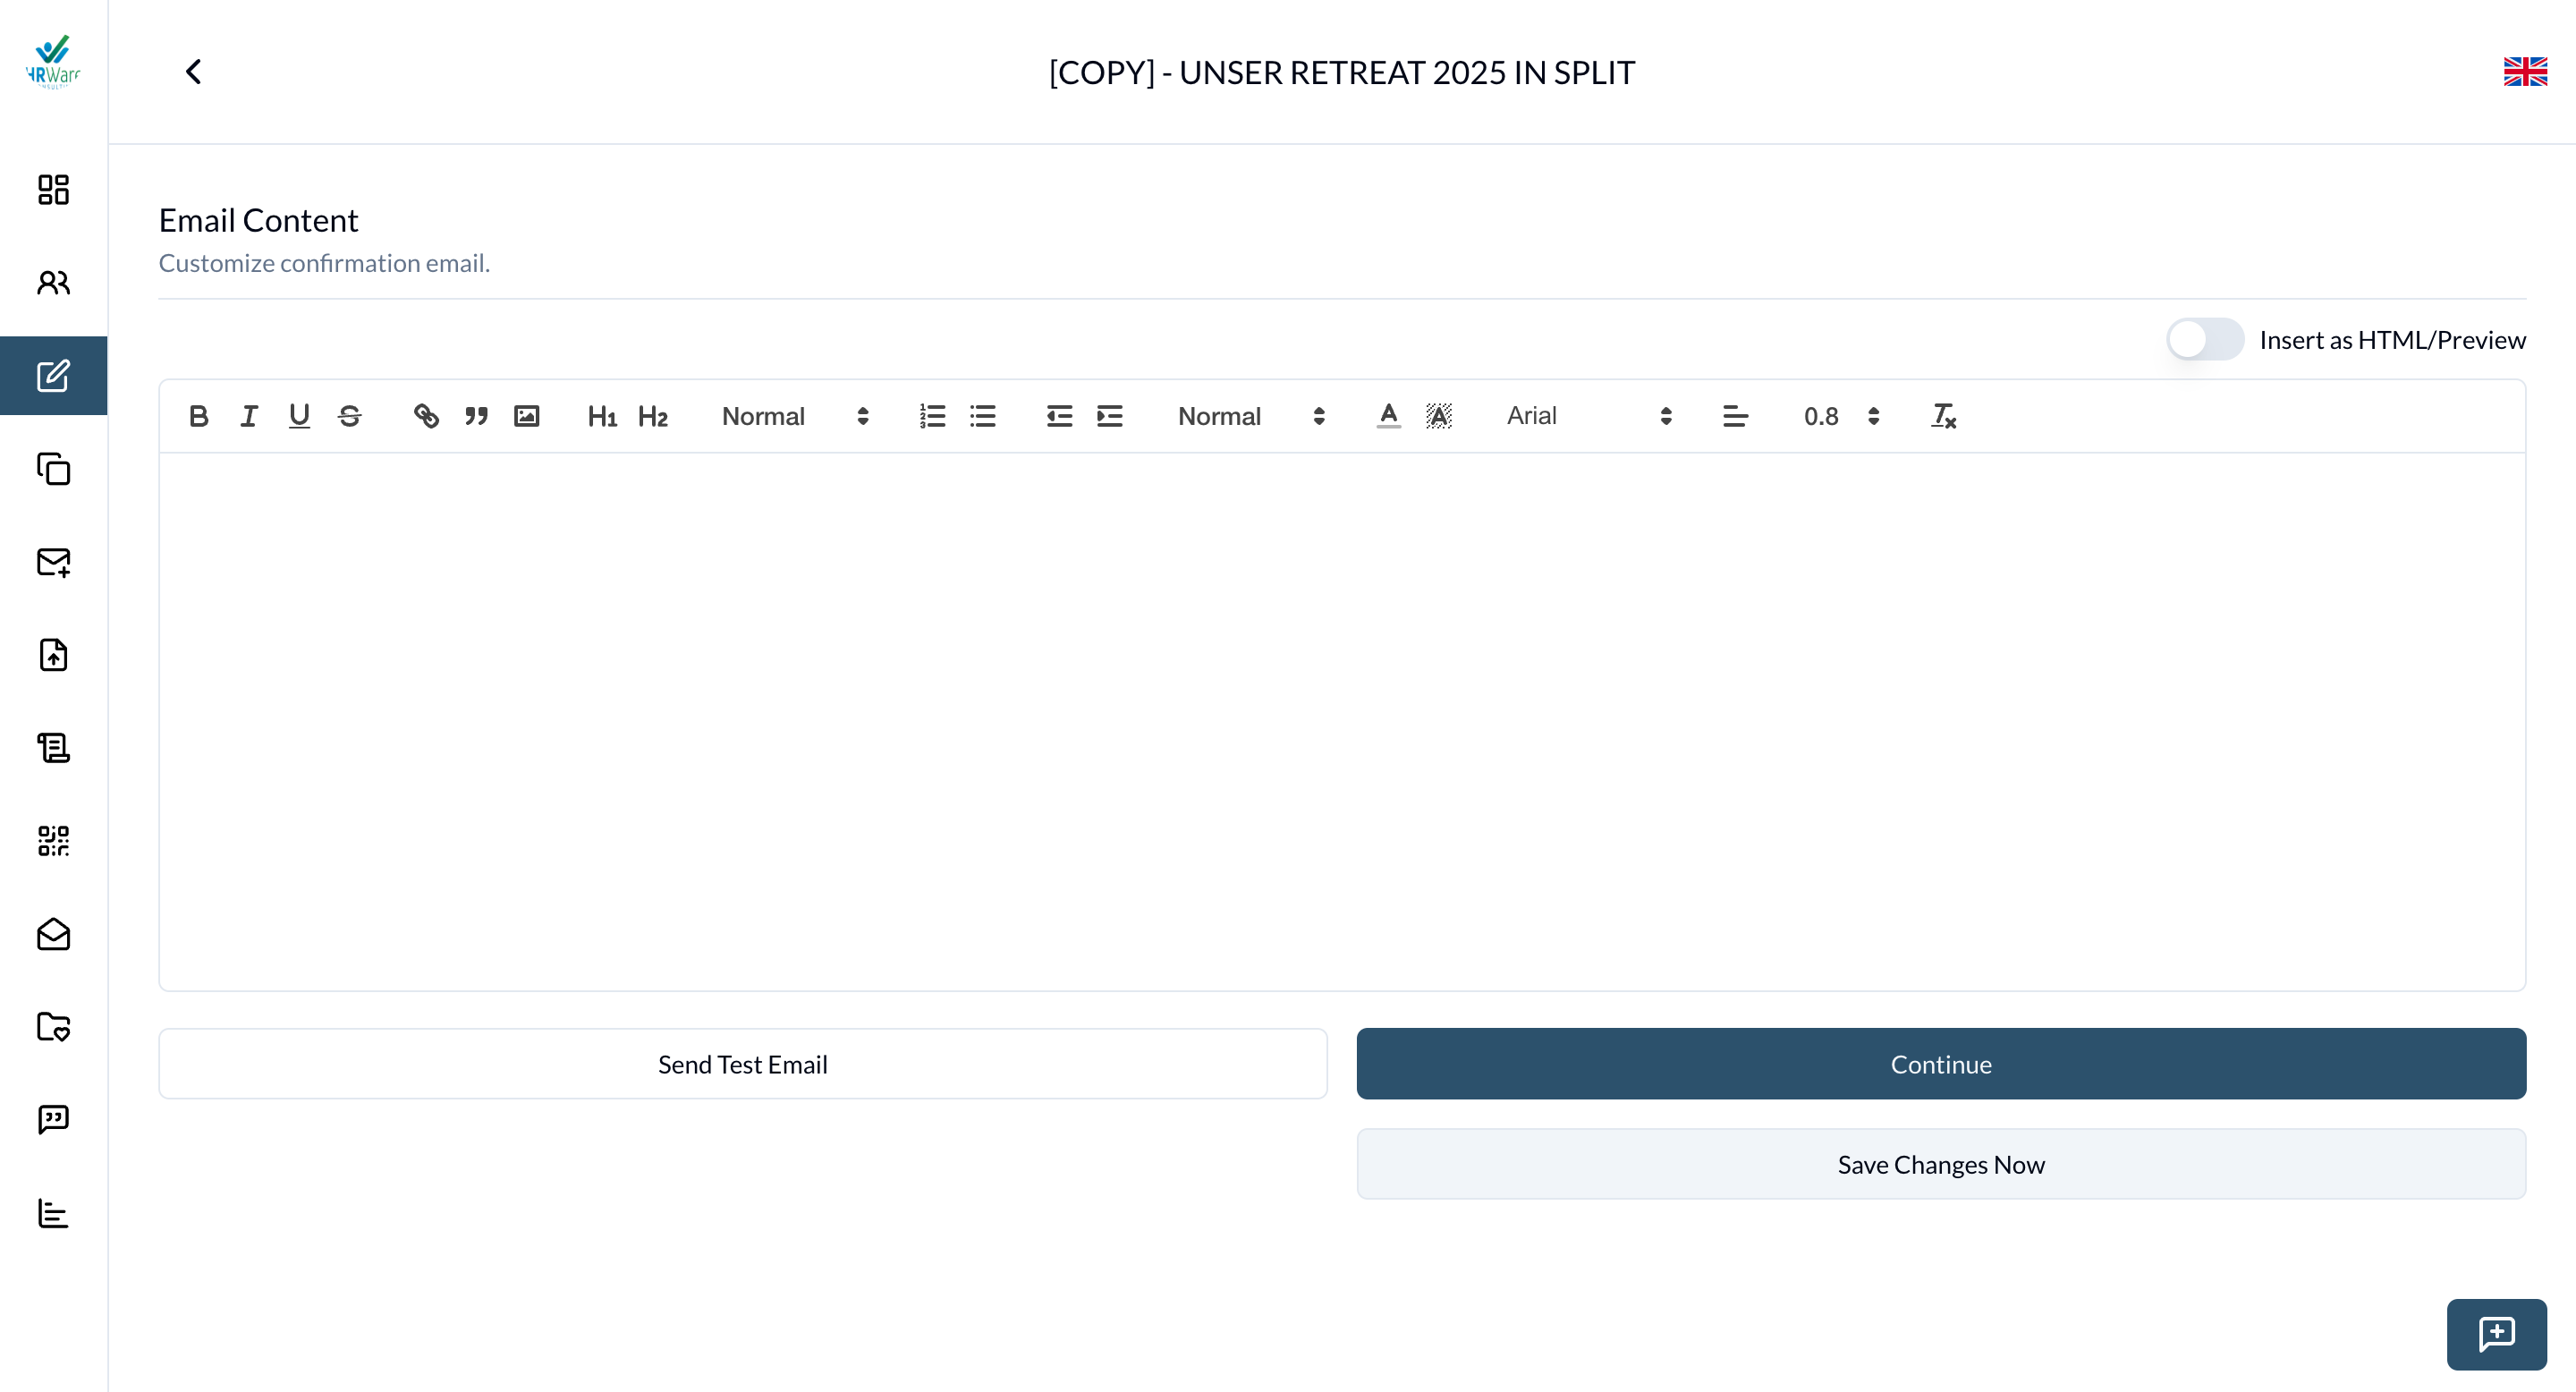
- Email Editor: Compose the confirmation email using the editor. Toggle Insert as HTML/Preview to paste HTML content and preview it on the right side.
- Send Test Email: Click the button to send a test email. Enter your email address to receive the test email content.
- Save change now: Click the Save change now button to update the event immediately.
Step 5: Custom Fields
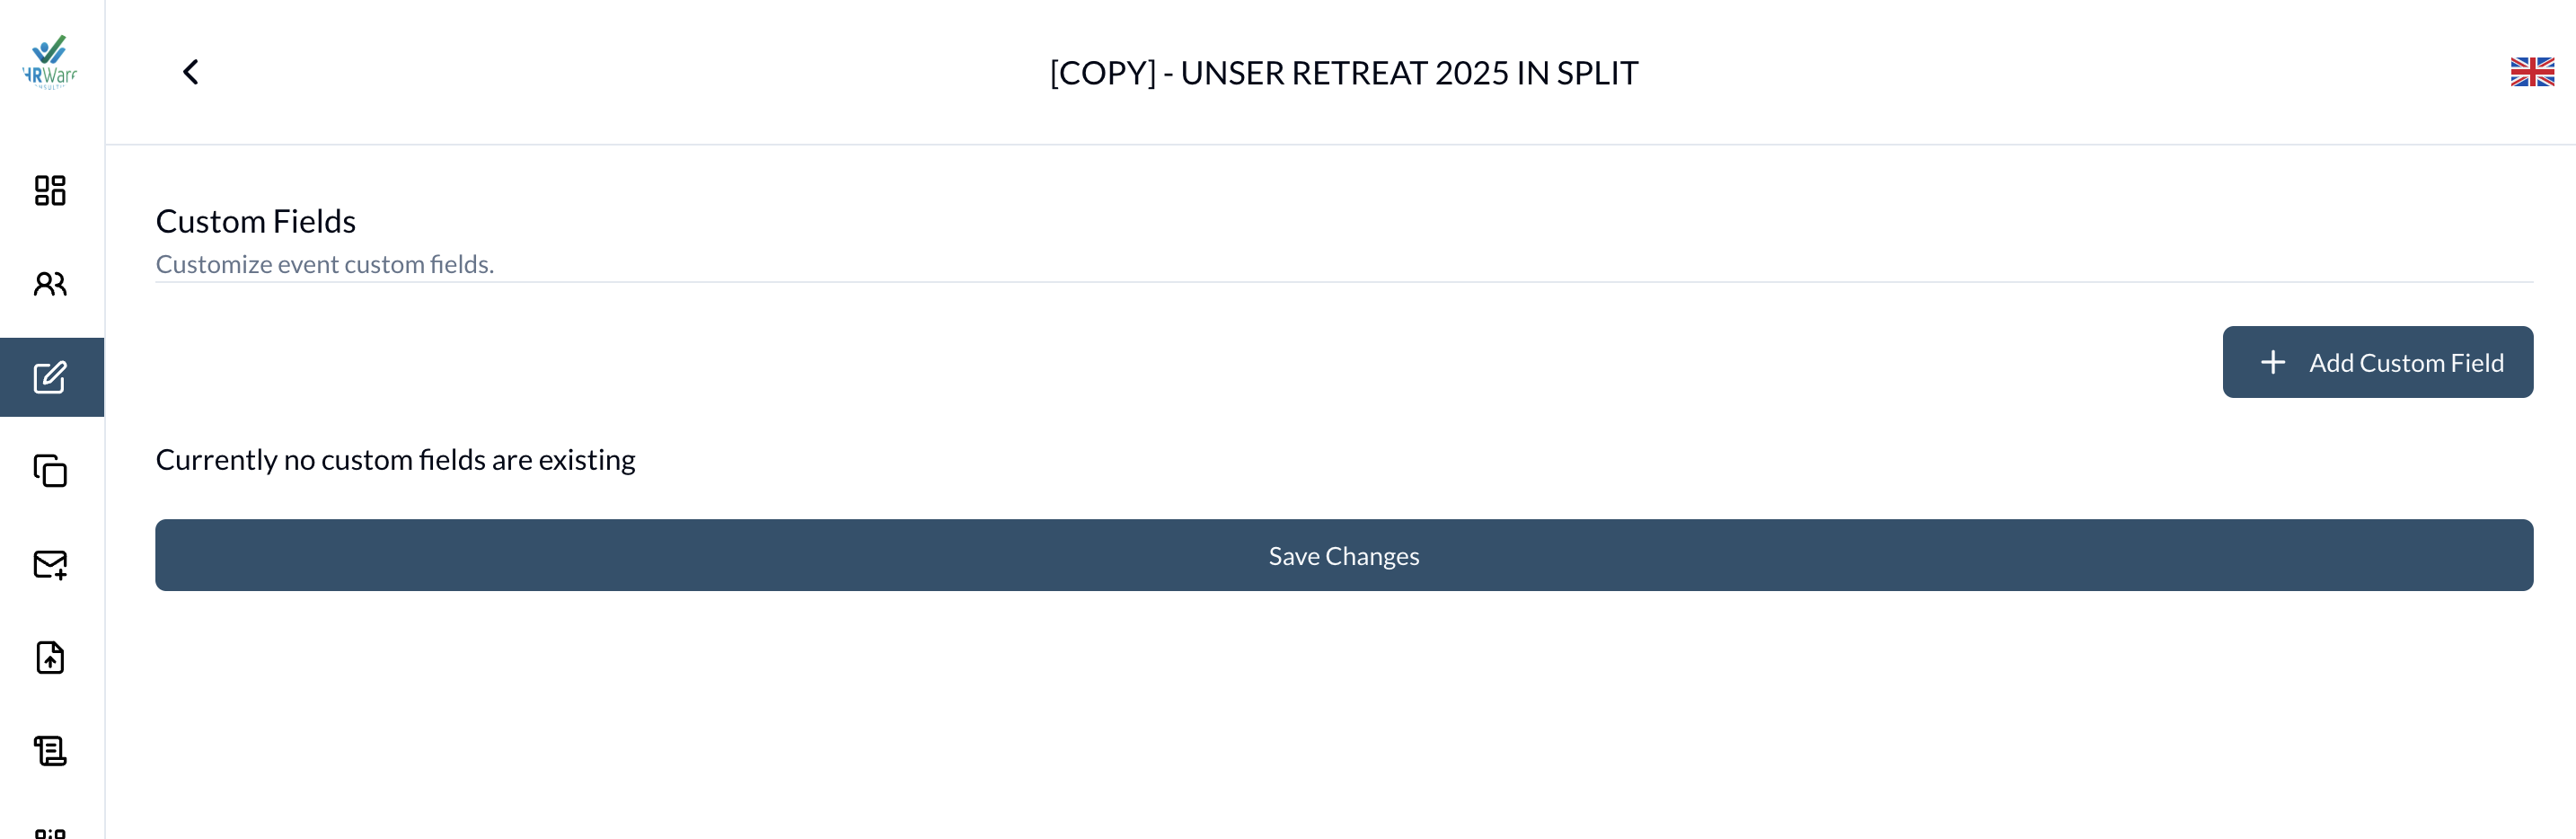
-
Add Custom Fields: Click the Add Custom Field button to add custom fields to the event registration form.
- Title: Select an existing custom field from the Custom Fields Library (visit Custom Fields Library) or create a new one. If selecting from the library, the type will update accordingly.
- Type: Choose the type of the custom field:
- TEXT: A single-line text input field.
- CHECK_BOX: A box that can be checked or unchecked, allowing for multiple selections.
- SELECT_BOX: A dropdown menu with multiple options to choose from.
- DATE_TIME: A field for selecting date and time.
- RADIO_BUTTON: A set of options where only one can be selected.
- For CHECK_BOX, SELECT_BOX, and RADIO_BUTTON types, define the name and fee for each option.
-
Save Changes: Click the Save Changes button to update the event.