Register Event Form
Overview
The guest clicks the Register now or Book now button on the event details page to enter the registration page.
Register Event Form Step 1: Attendee Information Form
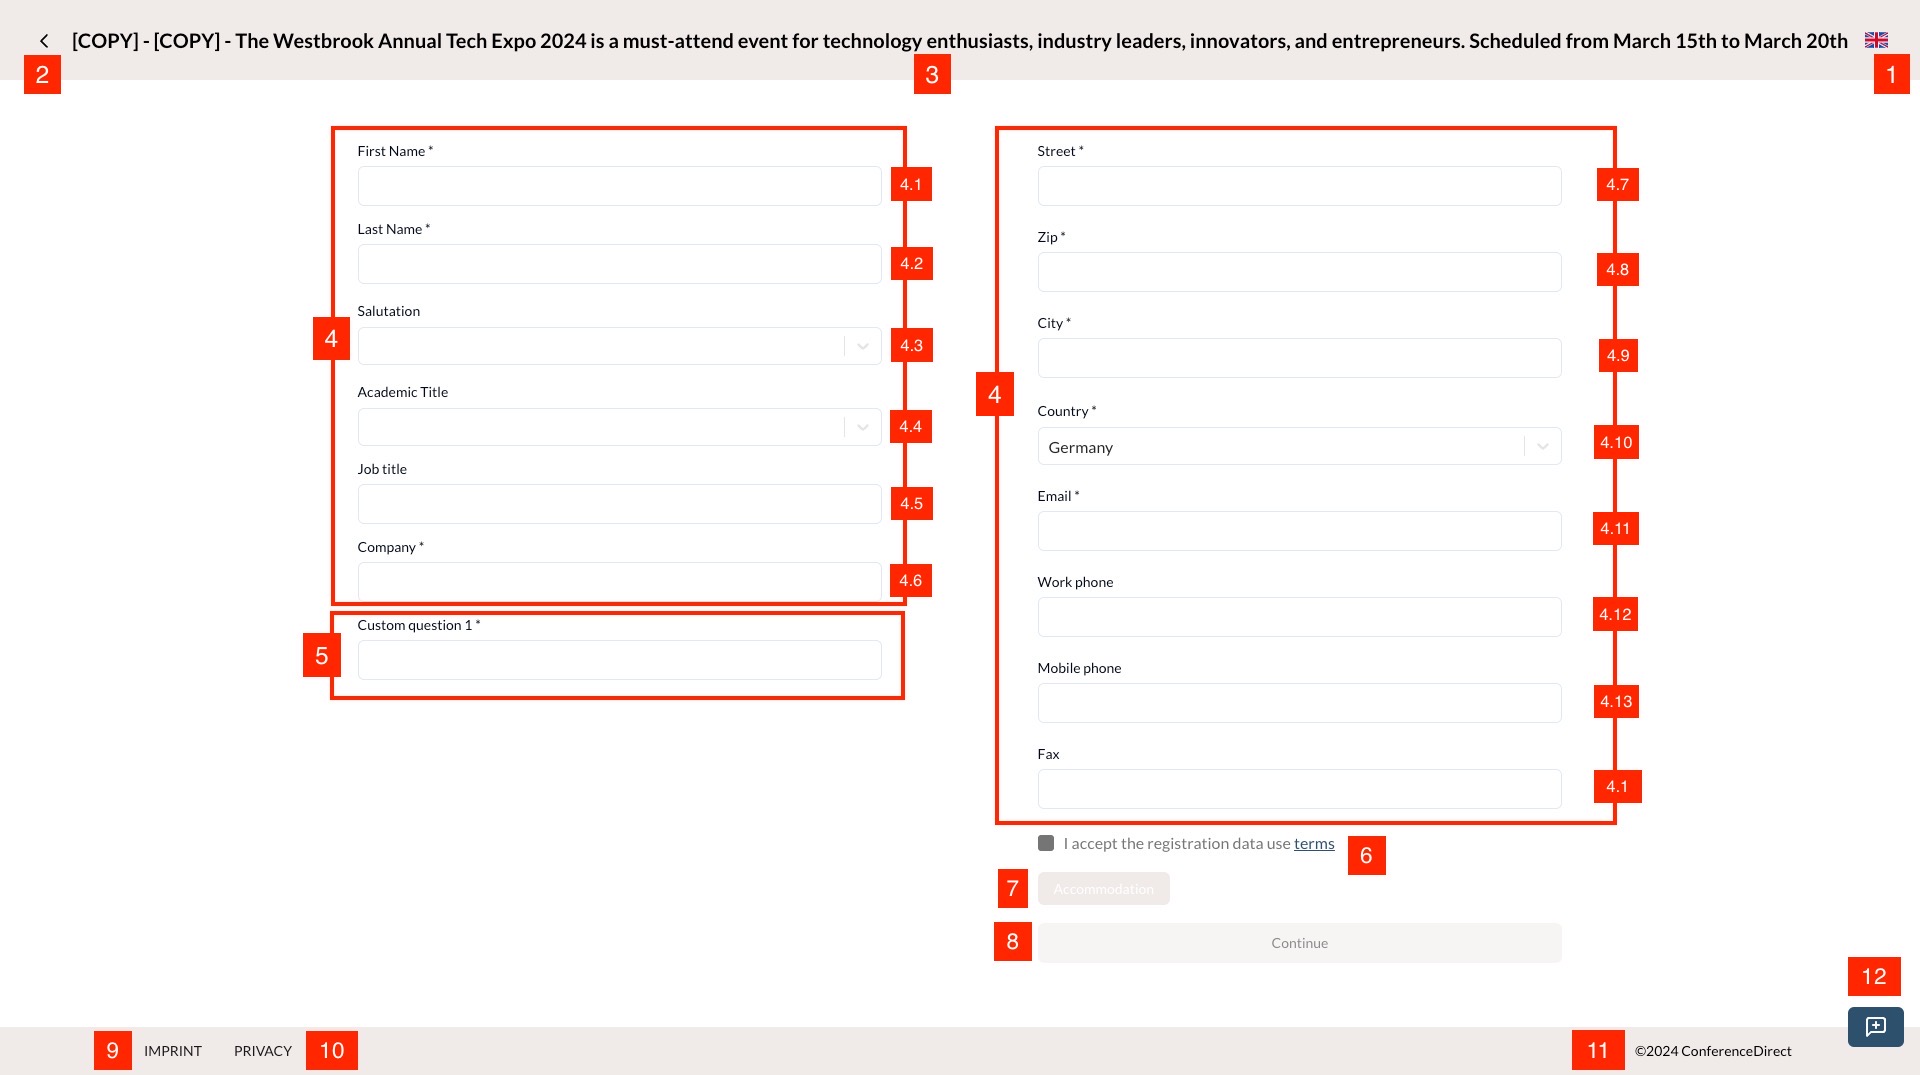 1.1: Register Event Form step 1.
-
Change language button: This is the button for change language.
-
Back button: This is the button for back to the event details page.
-
Event title: This is the title of the event - mapped to the Title field in the event settings step 1.
-
Event default questions: The event registration form contains default questions (Q1-Q14) that are configured in the Form Builder section of event settings step 2. For each question, organizers/admin can specify if it is required and if it should be displayed in the form by toggling the Is required? and Show this question? settings respectively. However, the question type and title cannot be modified.
Each question consists of a title, a required field indicator (star), an input field or selection list, and an error message display area.
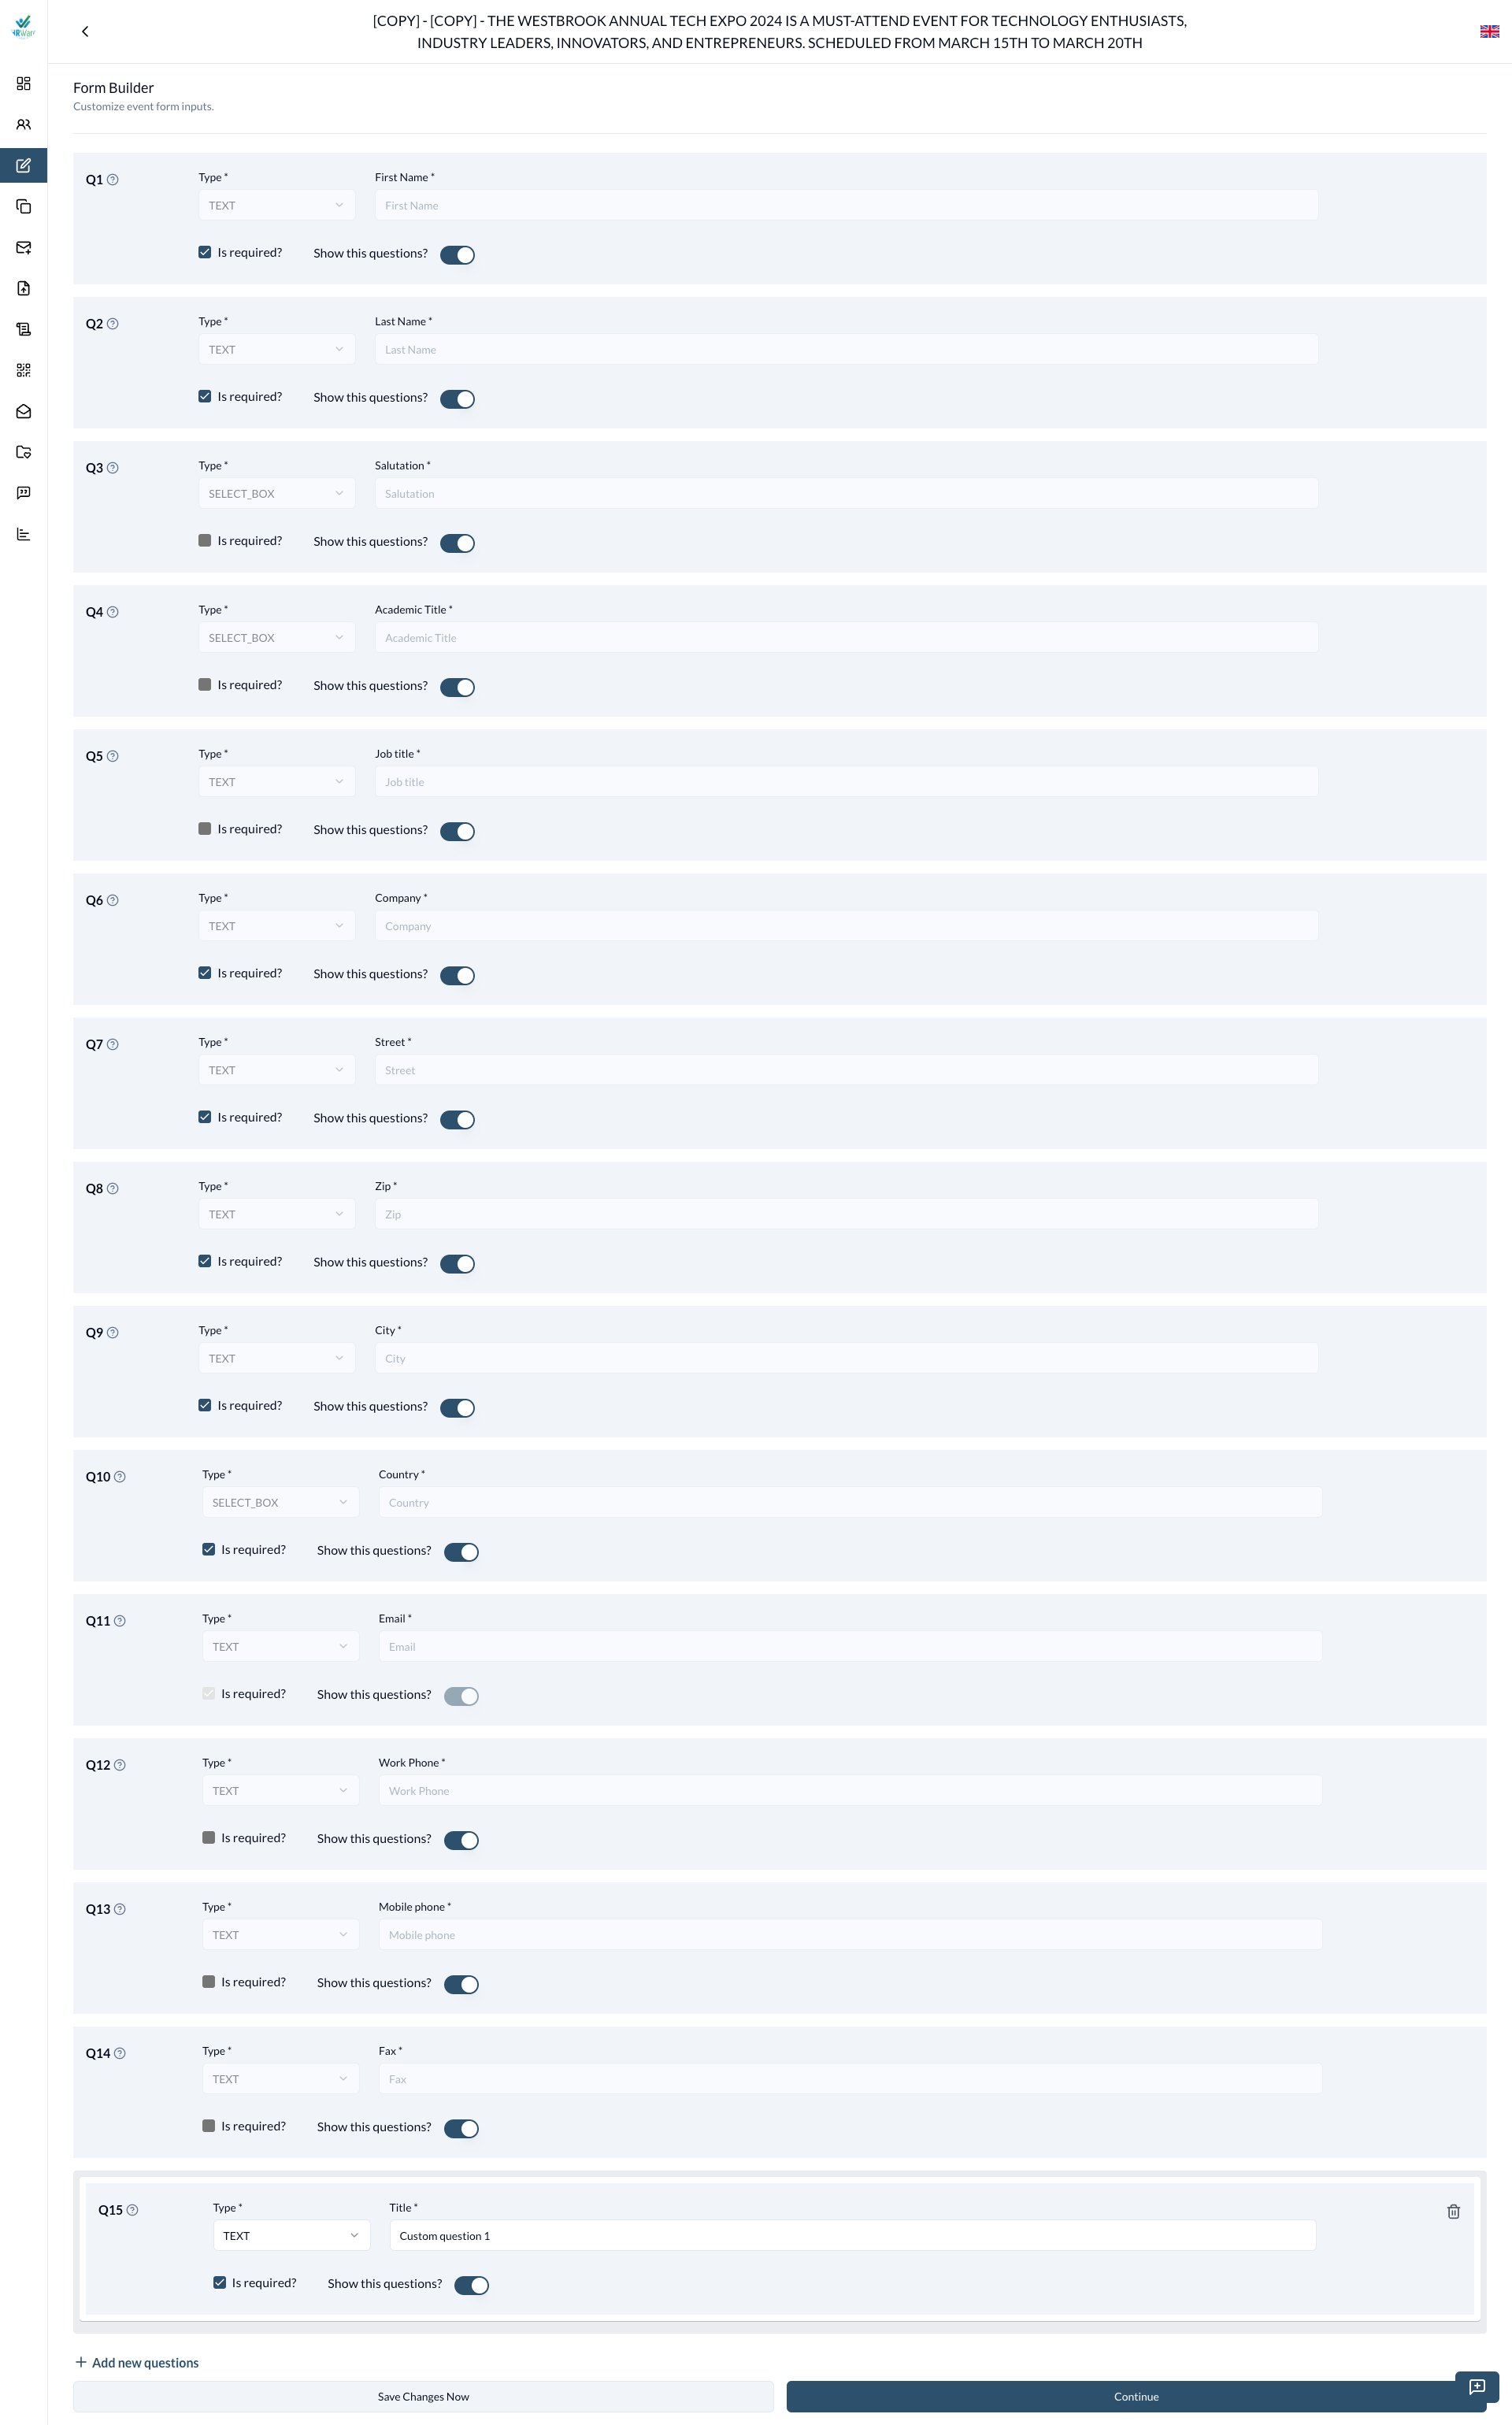 1.2: Event Setting step 2.
-
Event Custom Questions: Custom questions can be configured in the Form Builder section of the event settings. Organizers and administrators can add, edit, and delete custom questions, as well as specify whether each question is required and visible by toggling the Is required? and Show this question? settings. The order of custom questions can be rearranged through drag-and-drop functionality in the Form Builder section.
There are 5 types of questions available:
- Text for free-form text input. The input field is a text box.
- Checkbox for multiple selection. The input field is a list of checkboxes.
- SelectBox for dropdown selection. The input field is a dropdown list.
- Datetime for date and time input. The input field is a date and time picker.
- Radio button for single selection. The input field is a list of radio buttons.
If the question is required, a star will be displayed next to the question title.
-
Accept terms and conditions checkbox: This is the checkbox for attendees to accept the terms and conditions. Check it to enable the Continue button.
-
Accommodation: This is the accommodation information of the event - mapped to the Hotel Booking URL field in the event settings step 3. Only display when Hotel Booking URL is set.
-
Continue button: This is the button for attendees to continue to the next step. Only display when Accept terms and conditions checkbox is checked and all validations are passed.
-
Imprint: This is the imprint of the event.
-
Privacy Policy: This is the privacy policy of the event.
-
Copyright: This is the copyright of the event.
-
Feedbacks button: This is the button for attendees to give feedbacks for our product.
Notes:
- Form validation is triggered when attendees click the Continue button. All required fields must be filled out correctly before proceeding to the next step.
Register Event Form Step 2: Custom Fields Form
 1.3: Register Event Form step 2.
This step is only displayed when the event has custom fields configured in the Custom Fields section of the event settings step 5.
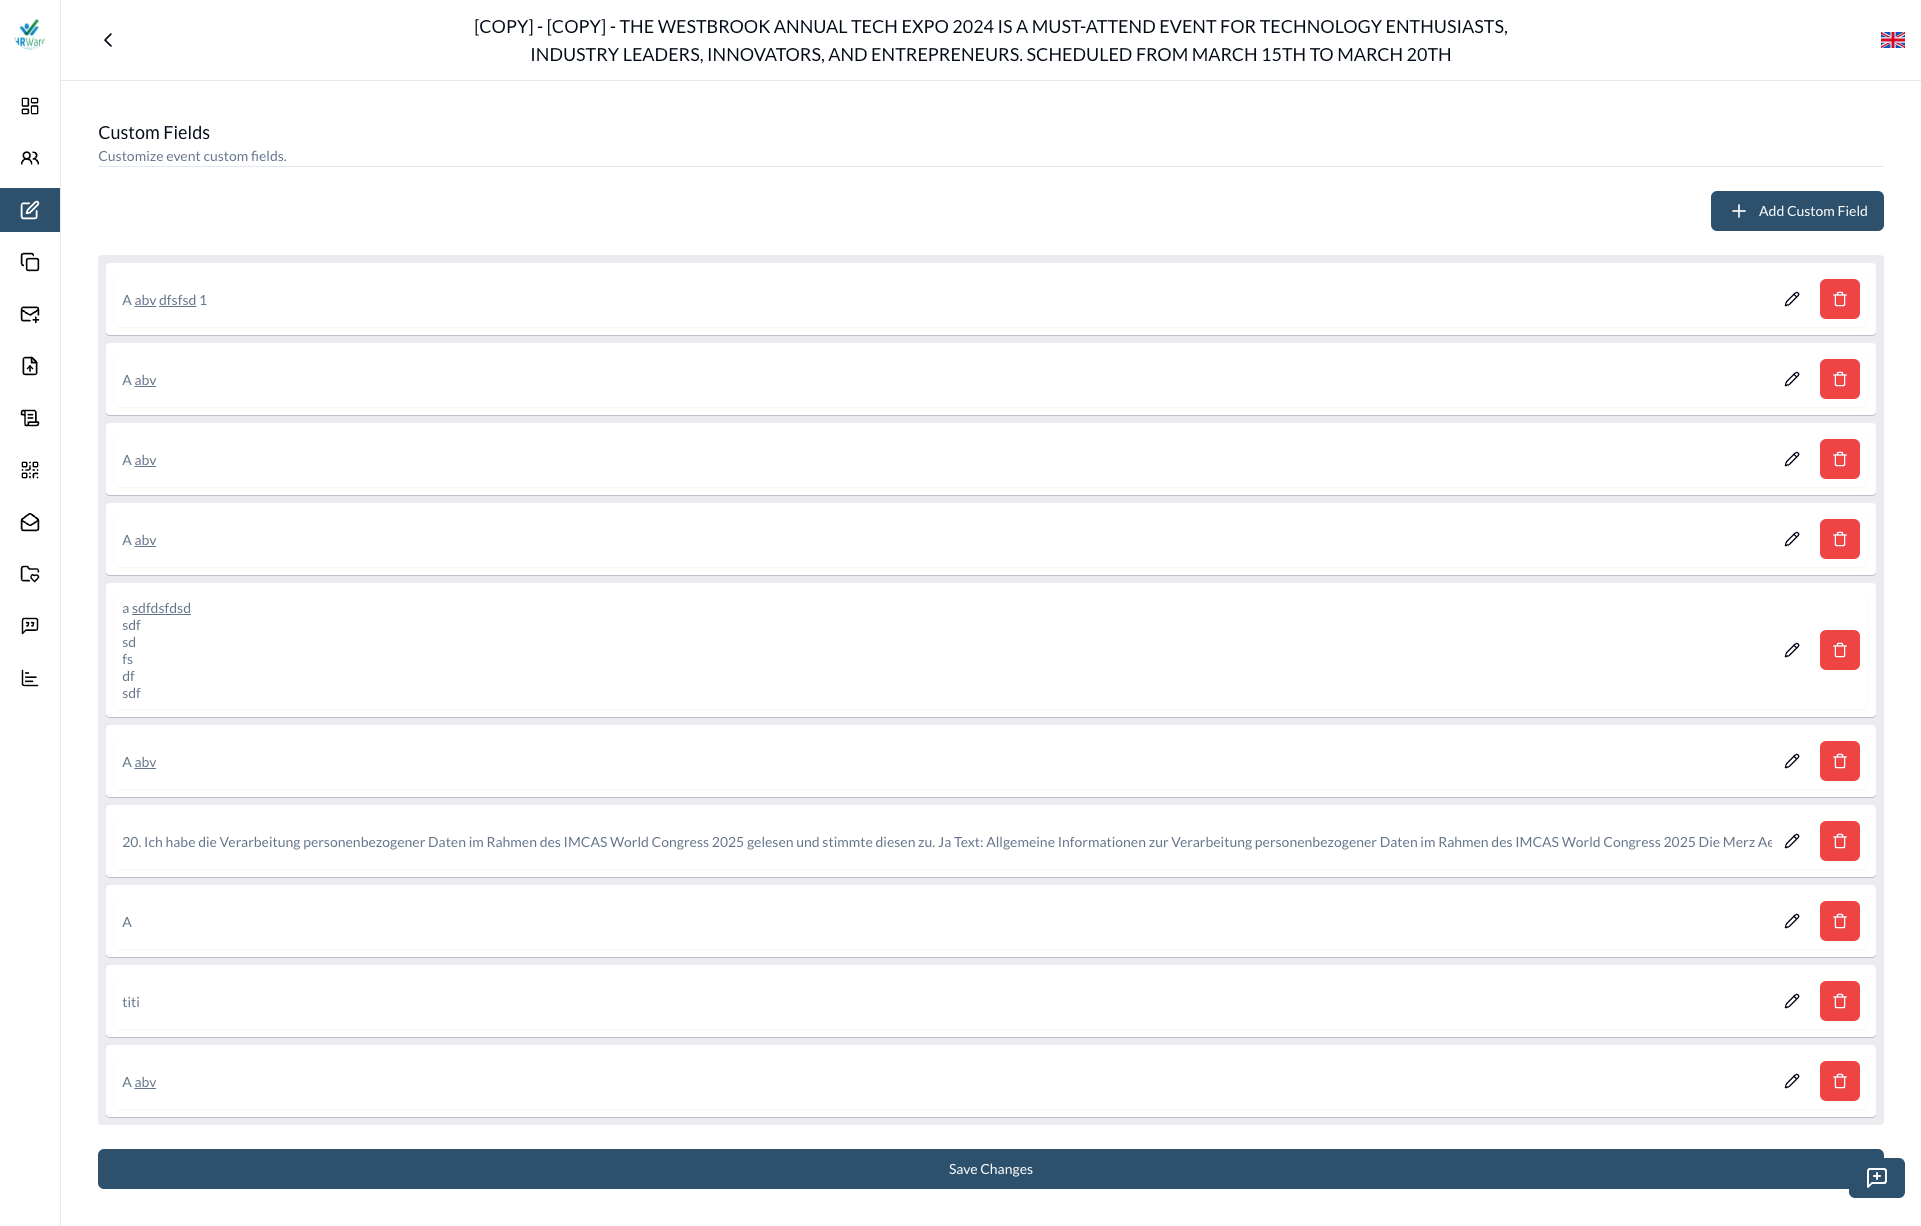 1.4: Event Setting step 5.
-
Back button: This is the button for back to Register Event Form Step 1: Attendee Information Form.
-
List of custom fields: This is the list of custom fields configured in the Custom Fields section of the event settings step 5. Organizers and administrators can:
- Add, edit, and delete custom fields
- Rearrange the order of fields through drag-and-drop functionality
- Add hyperlinks to field titles by clicking the Link icon
- Set fields as required or optional
- Configure field options for SelectBox, Radio button, Checkbox types and add fee of each option. Attendee will pay additional fee for each option selected.
Each custom field consists of a title (include hyperlink if added), a required field indicator (star), an input field or selection list, and an error message display area.
With the SelectBox, Radio button, Checkbox types, the options are displayed including the additional fee for each option (if added). Attendee will pay additional fee for each option selected.
There are 5 types of questions available:
- Text for free-form text input. The input field is a text box.
- Checkbox for multiple selection. The input field is a list of checkboxes.
- SelectBox for dropdown selection. The input field is a dropdown list.
- Datetime for date and time input. The input field is a date and time picker.
- Radio button for single selection. The input field is a list of radio buttons.
Notes:
- Form validation is triggered when attendees click the Continue button. All required fields must be filled out correctly before proceeding to the next step. Click the Continue button to redirect to Register Event Step 3: Attendee Overview registration.
Register Event Form Step 3: Attendee Overview Registration
 1.5: Old UI Register Event Form step 3.
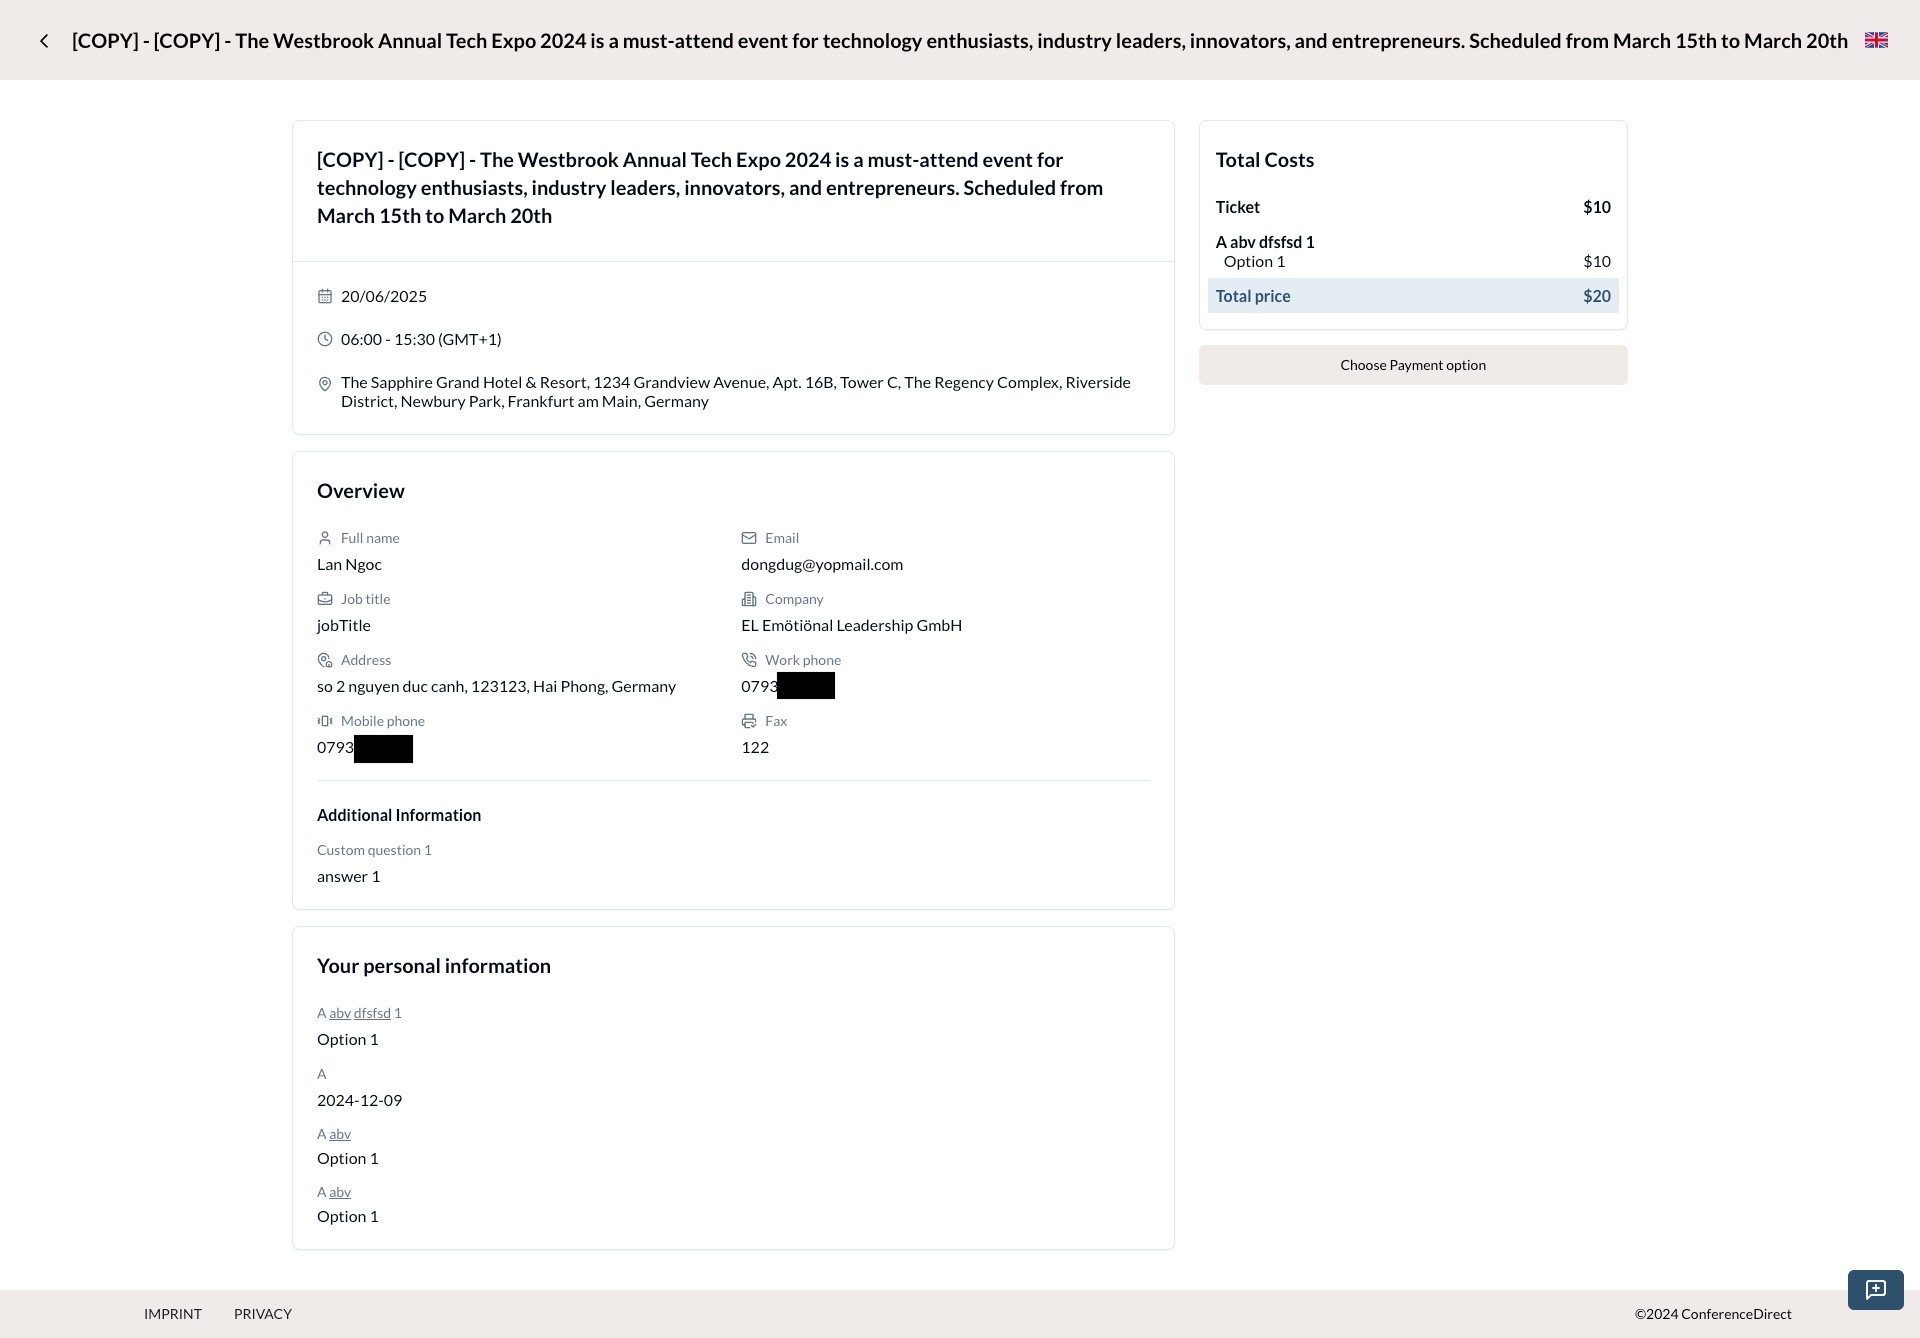 1.5.1: (Updated 2024-12-10) New UI Register Event Form step 3.
-
Overview label: This is the label for the attendee overview registration section.
-
Attendee information: This section displays all the attendee information entered in Register Event Form Step 1 - Event default questions.
-
Custom questions: This section displays all the attendee information entered in Register Event Form Step 1 - Event Custom Questions. Only display when the event has custom questions configured and attendee filled in Register Event Form Step 1.
-
Custom filed label: This is the label for the custom fields section.
-
Custom field value: This section displays all the attendee information entered in Register Event Form Step 2 - Custom Fields. Only display when the event has custom fields configured and attendee filled in Register Event Form Step 2.
-
Event information label: This is the label for the event information section.
-
Event information: This section displays the event information including the event title, event date, and event location (Same as the event details page).
-
Total cost section: This section displays the total cost of the event including the fee of ticket and additional fee. Only display when total cost = event fee + additional fee is greater than 0.
-
Total cost label: This is the label for the total cost section.
-
Fee of ticket: This is the fee of event.
-
Additional fee: This is a list of additional fee for the event when attendee selected the options in Register Event Form Step 2 - Custom Fields.
-
Total cost: This is the total cost of the event including the fee of ticket and additional fee.
-
Pay button: This is the button for attendees to pay for the event. Redirect to the payment page. Only display when the fee of ticket (event fee + additional fee) is greater than 0. If not, the Complete registration button will be displayed.
-
Complete registration button: This is the button for attendees to complete the registration. Only display when the fee of ticket (event fee + additional fee) is 0. (No need to pay for the event (Register Event Form Step 4: Payment), pass to Register Event Form Step 5: Registration Success)
Register Event Form Step 4: Payment
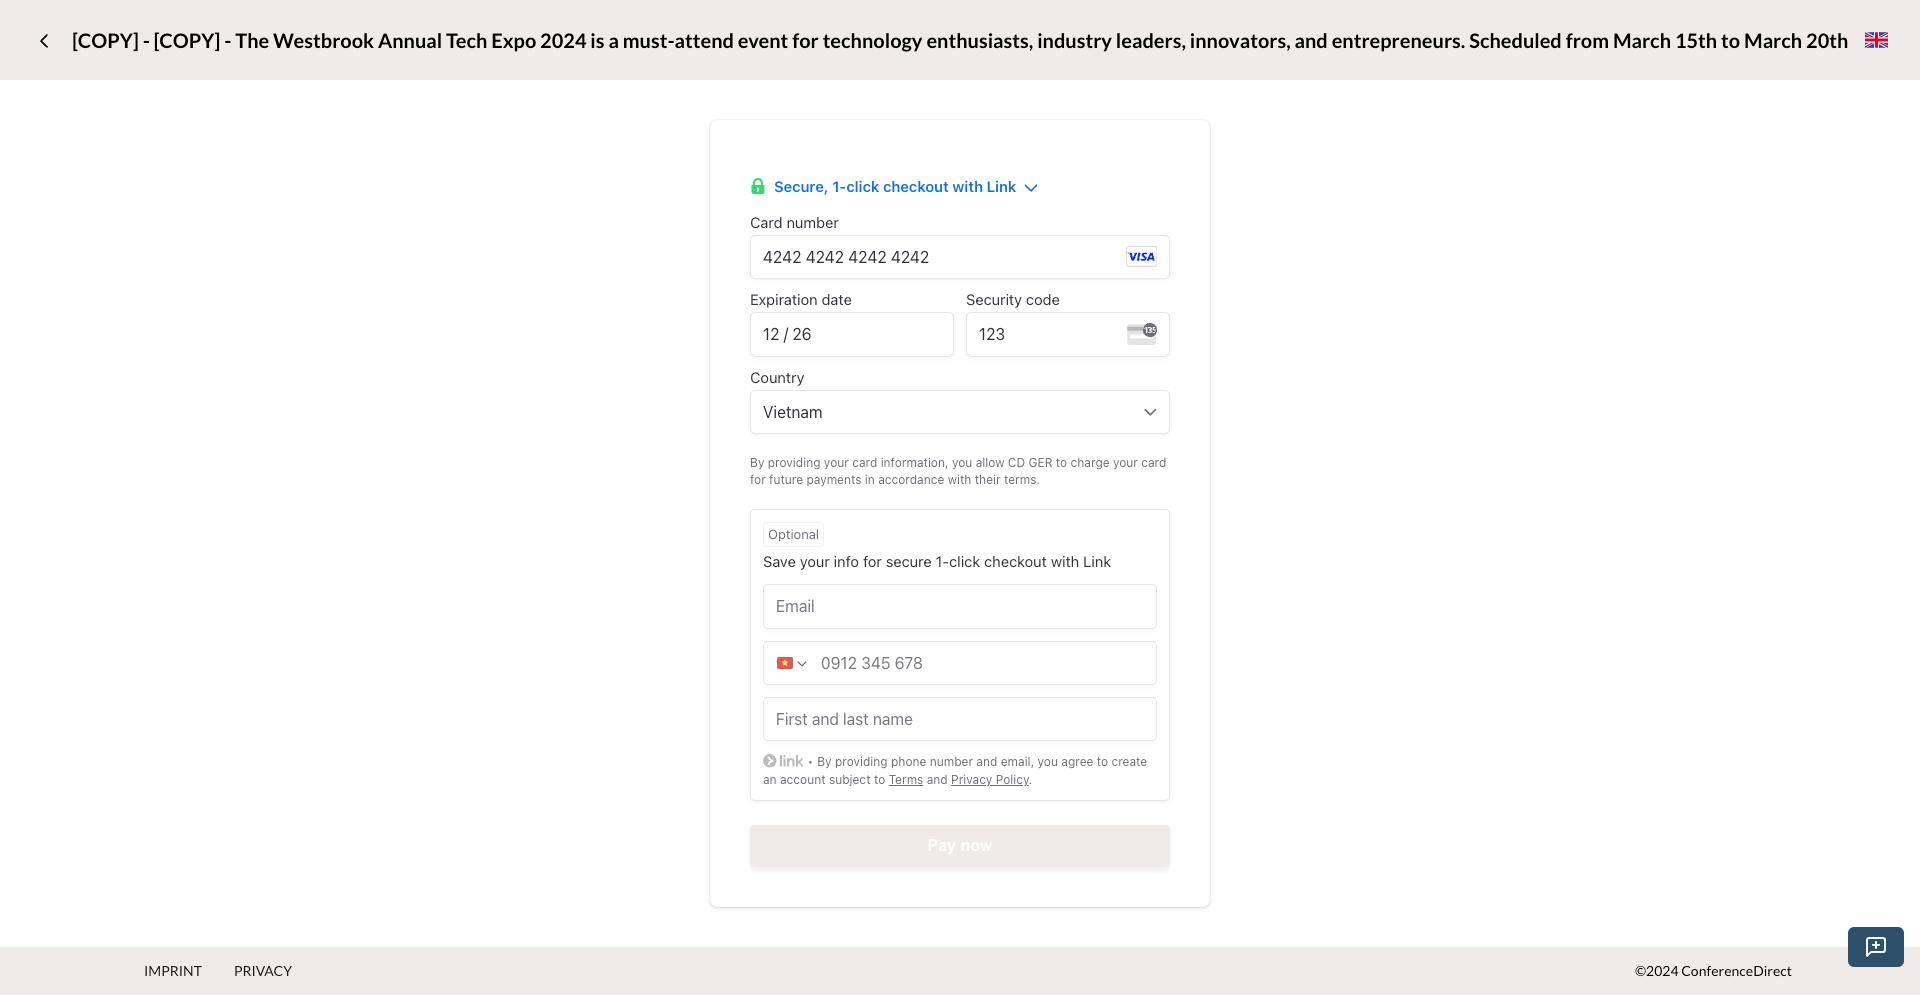 1.6: Register Event Form step 4.
Only display when the fee of ticket (event fee + additional fee) is greater than 0.
Test card: https://docs.stripe.com/testing
Register Event Form Step 5: Registration Success
 1.7: Register Event Form step 5.
Click the Back to event button to redirect to the event details page.